Barry's Coilguns
Discovery Coilgun
- Introduction
- Photographs
- Overview
- Design
- Spiral Coil
- Observations
Spiral Coil Construction
How do you build an extremely high-power flat pancake coil?
Spiral Coil
 This coil was custom-made by the talented metalworker and f/x artist Tod
Todeschini in the UK, owner of custom fab shop Tod's
Stuff. A good man to work with and extremely trustworthy to get the job done right and on time.
This coil was custom-made by the talented metalworker and f/x artist Tod
Todeschini in the UK, owner of custom fab shop Tod's
Stuff. A good man to work with and extremely trustworthy to get the job done right and on time.
Tod was the lead f/x technician in Arizona during the shooting. We worked together to ensure proper coilgun operation, such as with the optical sensor reliability and with safe discharge. Actually his capable hands did all the work and I helped out where I could.
Construction
Tod tells me his construction process:
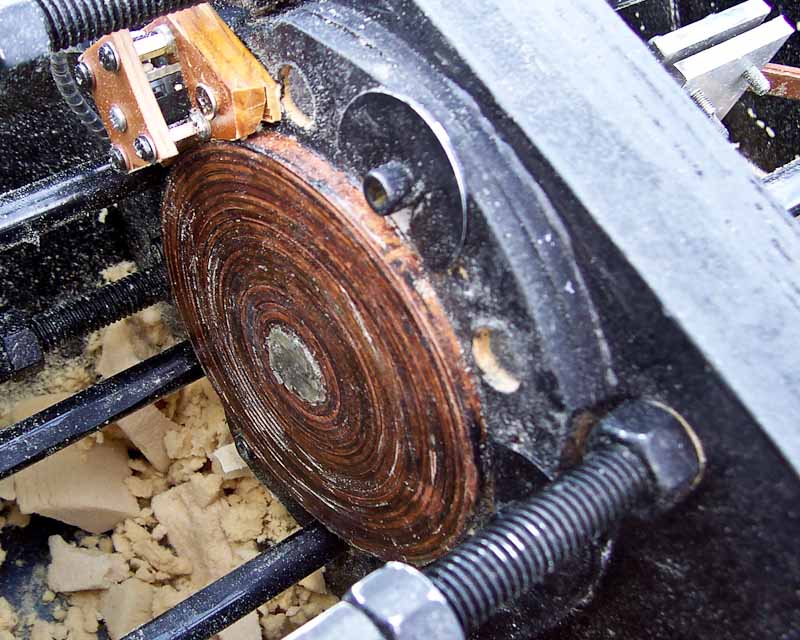

"The copper was just whatever they had on the shelf, no particular purity or grade, and was cut from 2mm sheet at 10mm wide. The copper curls as it is cut so anneal it all with a big blow torch and pull it over a curved surface, this will remove kinks and straighten it.
Scarf joint the ends and silver solder together and file back to be a uniform thickness, deburr the edges carefully.
Make two aluminum plates 6 mm thick and 10mm apart with a bolt between them so you can roll up the copper strip as evenly as you can.
Anneal the whole lot again leaving the copper as soft as can be.
Silver solder the 'in' and 'out' strips onto the coil, at 90 degrees to the plane of the coil.
Unbolt the aluminum plates and remove the coil and on a flat surface carefully loosen up the coil a bit.
Cut up 10mm wide strips of 0.5mm insulating material and slip them between the coil turns. This part alone probably took me four hours and is as tricky as hell.
Cut out a circle of the right diameter from the centre of a piece of 9mm board that slips closely around the coil, glue the board to the supportling board so that you have a perfecly flat recess of the right diameter and drill out clearance holes to pass the in and out terminals through and test fit the coil.
Take it out and make sure it is totally free of any metallic swarf or dust as this causes tracking and arcing which makes more debris.
Place back in the recess. Warm the coil a little with a hot air gun or blow torch and smear on loads of 5 minute epoxy resin, which will flow in and pot the lot, making sure there is a thickness on the front face.
Wait for it to harden and then sand back the front face on a flat board with a sheet of paper stuck to it.
When the copper shows bright then it is through. the potting will stop any metallic filing dust from staying between the coils.
I had the coil supported on 50mm of MDF and the acceleration forces made it sink into this during testing. I would use a different support next time. I avoided metal supports as I didn't know what they would do, but if it did it again I would go make a fibre reinforced concrete support for the coil."
| < Previous | Page 5 of 6 | Next > |
©1998-2026 Barry Hansen