Other Technology
KITT Car Scanner
- Introduction
- Schematic
- Construction
- PCB Procedure
- PCB Supplies
KITT Car Construction
How did I build the KITT Car Scanner? How are the parts arranged?
Construction
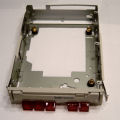
Find an old CD-ROM drive, and discard everything except the frame and front panel. Mount six incandescant lights to the front panel. |
Why? If you start with a frame that fits your computer's font panel slot, you get a big head start. This means you won't need to fabricate a bunch of sheet metal. | |
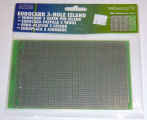
Choose a circuit board suitable for building the project. This one by Vellem is relatively inexpensive. The 3-hole islands simplify connections. You can also use a small solderless breadboard. |
Why? Chips and other components come with pins on 0.1" centers. You'll need something to hold the electronics and wiring. Use a board large enough that can be trimmed to fit into a CD ROM drive case. |
|
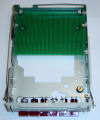
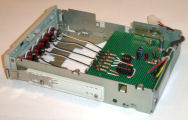
Trim and mount the circuit board into the CD drive frame. This is where the Dremel tool comes in handy! |
Why? A secure mounting scheme will protect the parts during assembly and use. | |
| Mount the lights in the front of the CD frame. | Why? Connecting the lights first will let you check how it will eventually look. You can make changes now before spending a lot of time wiring. | |
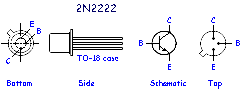
| Wire the 2N2222 driver transistors to the lights, using this connection guide. | Why? Early testing for instant gratification. | |
Install and connect the remaining parts using the schematic diagram. This is a relatively simple circuit, but there are lots of fiddly connections on 0.1" centers. Take your time. Use a continuity checker to buzz out all the wires before inserting chips into sockets. |
Why? The parts go in before the lights go on. The schematic is arranged like a top view of the circuit board. |
|
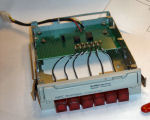
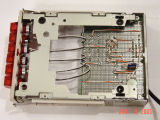
Most connections are done on the bottom of the circuit board. This photo shows my preference for wires connecting one direction (left to right), and the power and ground buses soldered the other direction (up and down) across the 3-pin islands. |
Why? Nobody will see the bottom, so this wiring can be messier than the top. | |
Connect the power to the computer's supply, and finish testing. Set the speed for the desired effect. |
Why? If it's too slow, then it looks jerky. After all, there are only six lamps. If it's too fast, then it's too active and doesn't feel like the computer is scanning the room. |
|
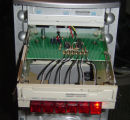
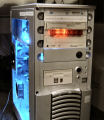
Finish mounting the KITT car scanner, and enjoy! |
|
| < Previous | Page 3 of 5 | Next > |
©1998-2026 Barry Hansen
