Rover Location Database
Ham Radio
- K7BWH
- My Shack
- Hermes SDR
- IC-7100 Fldigi
- FT897d Settings
- FT897d Linear
- TS850 Control
- TS850 Assembly
- VHF Rigs
FLDIGI and Icom IC-7100 Config Setup
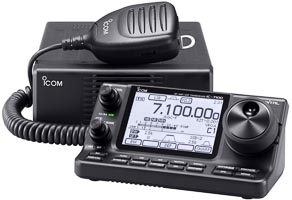
Here's how I successfully configured the IC-7100 for Fldigi in November 2013.
I'm using Windows 7 64-bit. Also see IC-7100 Info Pages by Jim W4WWJ.
Download USB Drivers
- The latest drivers can always be downloaded from
here.
Look for IC-7100 > USB Driver Utility - Read the USB Driver Installation Guide
- I really do recommend reading the installation instructions.
-
 USB Driver Software, v1.20, 2013/08/01
 - Run the USB Driver installation package before connecting the USB cable for the first time.
- Unzip USB Driver ZIP first, or the installation will fail.
- Restart the PC.
- Connect the USB cable, then power on the IC-7100.
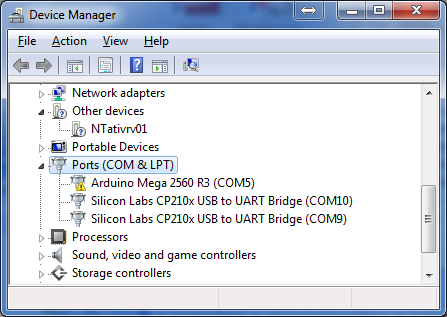
- Start the Device Manager > Ports (COM & LPT)
- Make note of driver name "Silicon Labs CP210x USB to UART Bridge"
- Make note of your port numbers (COM4 and COM5).
Download Fldigi Software
- Download Fldigi (v3.21.77) and Flrig (v1.3.14) from www.w1hkj.com
- Download the rigCAT xml file for the IC-7100
- Copy "IC-7100.xml" to the Flrig folder (c:\Program Files(x86)\Flrig)
- Join the win-fldigi support group
Configure IC-7100
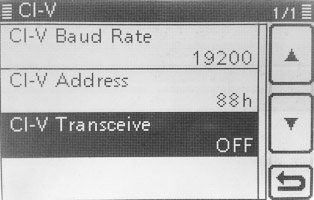
Hint: Set > Connectors > CI-V
- CI-V Baud Rate = 19200
- CI-V Address = 88h
- CI-V Transceive = Off
- Mode = USB-D
- Data on Mod = USB
- Data Mod = USB
- USB Mod Level = some suitable value, say 30%
Configure Fldigi
- Note that COM ports cannot be shared between programs. Do not try using flrig and rigcat concurrently.
- Run Fldigi
- Configure station info: Configure > Operator
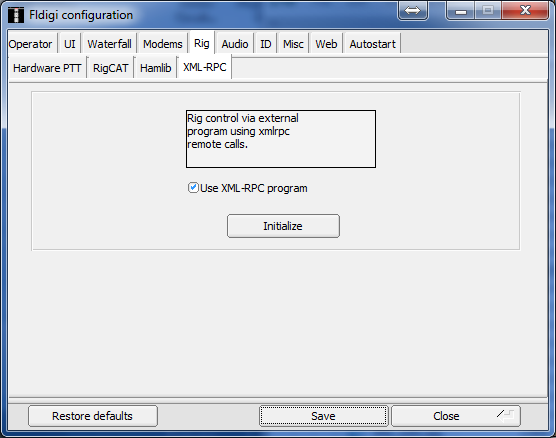
- Configure interface: Configure > Rig Control
Click Initialize, Save, Close. - Turn off RigCAT and Hamlib -- instead, RPC will communicate internally to Flrig which provides CAT control.
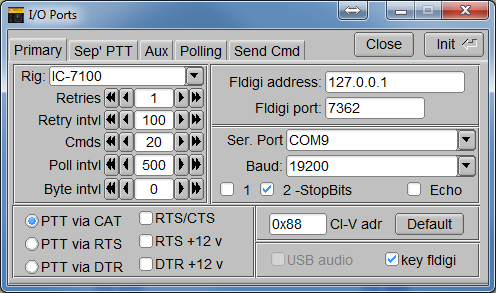
Configure Flrig
- Hint: Config > Xcvr select
- Rig = IC-7100
- Ser Port = COM4
- Baud = 19200
- Click Init, Close
Run Programs
- Exit both programs
- Start Fldigi
- Start Flrig
- It should connect to both the transceiver and fldigi.
- Fldigi's waterfall should display what is heard.
- Flrig's frequency readout should track changes in the 7100's tuning knob.
- The 7100's frequency display should track changes you make in Flrig's frequency.
| < Previous | Page 4 of 9 | Next > |
Last Update 2015-04-01
©1998-2026 Barry Hansen
©1998-2026 Barry Hansen